How to control electric radiators with a nest thermostat -2024
As we move further in this rapidly changing arena of smart homes, the integration of technology into even the smallest appliances of our lives makes the management of our homes easier. The application of smart thermostats, such as the Nest thermostat, in electric radiator controls is one such development. This innovative way not only fulfills its purpose in making your home more comfortable, but also plays its part in energy efficiency.
It’s nice to know electric radiators can be controlled with a Nest thermostat, offering the homeowner more control and less energy consumption. The article takes an in-depth look at setting up and controlling electric radiators with a Nest thermostat via examining the required components, installation, and some tips on how it should be used.
Understanding Electric Radiators and Nest Thermostats
Electric Radiators
Electric radiators are among those highly efficient heaters that use electrical energy for the purpose of generating heat for room or area warming. Unlike traditional systems which would involve gas or oil, electric radiators offer installation flexibility and zoning. They may be fitted in individual rooms without requiring complex plumbing or ductwork and, thus, form ideal solutions for modern homes, especially in those spaces where traditional heating mechanisms are difficult to apply.
Operating electric radiators is relatively straightforward, and most models boast in-built thermostats for raising or lowering the heat at will. For more control and flexibility, though, integration of electric radiators with smart thermostats such as Nest is available.


Nest Thermostats
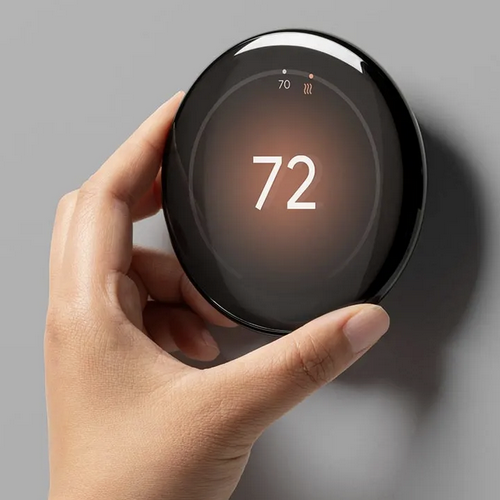
The Nest thermostat is a smart device that learns from your daily heating habits and preferences and can gradually optimize the heating schedule based on your lifestyle. This device connects with your home Wi-Fi and allows you to monitor and change your heating system through remote access via an application available on your smartphone.
Over time, it will pick up on the temperatures you usually prefer at different times of the day and will automatically turn the settings to help conserve energy while keeping comfort intact. With electric radiators and a Nest thermostat integrated, it’s much easier to optimize energy use, manage indoor climates more effectively, and really lower the cost of heating.


Components Used
The following components can be used to connect and manage electric radiators with a Nest thermostat:
- Nest Thermostat: This is the main controlling device; it automatically adjusts the heating system based on preference and schedule.
- Heat Link: It is the critical piece that bridges the Nest thermostat with the electric radiator. The Heat Link performs the switching of the radiator on and off upon instruction from the thermostat.
- Wiring: The Heat Link requires correct electrical wiring to be safely and reliably connected with the electric radiator.
- Professional Installation: With the extent of wiring involved, it is highly advisable that one seek the services of a qualified electrician, although some homeowners can still manage to install the system by themselves. Safety standards would also be followed.
Installation Steps
- Compatibility Check:
First, check that your electric radiator is compatible with the Nest thermostat. The Nest system can handle electric radiators, but it does have some power limitations. The Nest thermostat can control devices using its built-in relay but only if the load is below 700 watts. Because of this, if your radiator uses more than this, then you will require other components, such as a separate relay or contactor, to manage the load without risk. - Switch Off Power:
Safety first is always the best approach. Switch off the power to the electric radiator on your circuit breaker. This prevents the possible cases of electric shock in the process of installation. - Connect the Heat Link:
The Heat Link should be installed near the electric radiator. It serves as an interface between the thermostat and the electric radiator to pass on its commands for switching the radiator on or off.
– Connect the live feed from the electric radiator to the appropriate terminal on the Heat Link.
– Connect the neutral wire on to the corresponding terminal on the Heat Link.
– If necessary, connect any other wires that could be required by some models of radiators.
This should be done in confirmation with the manufacturer’s specifications to ensure such a system works correctly and safely. - Install the Nest Thermostat:
Once the Heat Link is wired correctly to the radiator:
- Mount the Nest thermostat on an interior wall, away from direct sunlight, windows, or drafts, for an accurate temperature reading.
- Follow the installation instructions using the Nest app or the user’s manual in order to connect your thermostat wirelessly to your home Wi-Fi network. Once paired, you’ll be able to control the heat remotely with your smartphone.
- Mount the Nest thermostat on an interior wall, away from direct sunlight, windows, or drafts, for an accurate temperature reading.
- Configure Settings:
When initially setting up in the Nest app, tell it that your heating system is electric radiators. In this way, the thermostat knows to behave in a manner that optimizes energy usage for electric heat. This will also let the Nest thermostat learn your habits and adapt to how you like your home heated.
Setting Up Your Heating Schedule
It picks up independent heating habits through the thermostat, enables it to learn from you. Automatically, in time, the system adjusts to your routine, heating when appropriate, while saving energy when you are away or asleep.
How to Set Up Heating Schedules
To fully exploit your electric radiator setup, you can create custom heating schedules using the Nest app:
- Create a Schedule for the Week: With the Nest app, you can establish a temperature setting per certain times of the day. You might want the radiator to maintain a higher temperature during morning and evening times while you are home and lower when you are at work or sleeping.
- Employ the Home/Away Assist feature: This will utilize the motion sensors and geofencing on your smartphone to determine if anyone is home. When the house has no one inside, the thermostat automatically cools down to save energy. Upon your return, it raises the temperature to a comfortable level.
- Remote Control: You can have control over the temperature of your electric radiators using the Nest app, even when away from home. That way, you can return to a warm house without having the heating on all day.
Optimal Use Tips
Maximum efficiency and comfort are achieved by taking into account the following:
- Regular Maintenance: Keep the electric radiators and thermostat in good condition. Radiators are highly prone to dust accumulation, which diminishes their overall efficiency. Cleaning them regularly, as well as the thermostat, helps in keeping their performance optimal.
- Energy Usage: The Nest app does an adequate job of providing insight into heating patterns and energy use. As one goes through this, it will further help in fine-tuning settings in an effort to make it work optimally and reduce costs.
- Experimenting with settings: Do not be afraid to play with your heating schedule and temperature settings. You may find, over time, that different settings are more comfortable during certain times of the year, or as your routine changes.
Solving Common Issues
In general, using electric radiators with a Nest thermostat will be pretty straightforward, but sometimes you may run into some issues. Here are solutions for common issues:
- Connectivity Issues: If your thermostat loses its connection with the Wi-Fi network or Heat Link, just make sure both devices are in range with one another and that your Wi-Fi signal is strong. Restart devices if necessary to reinstate the connection.
- Incorrect Temperature Readings: In case the thermostat appears to give incorrect temperature reading, keep it away from any drafts or direct sunlight and other heat sources that may interfere with the readings. Reconsider its location if necessary.
- Electrical Problems: The electric radiator will not respond to commands in case it is not fed with electricity. Ensure all wiring are well-connected, and the circuit breakers aren’t tripped. Check the wiring connections for the correctness of their security.
Conclusion
Controlling electric radiators with a Nest thermostat is a creative, modern method for your in-home heating system. If set up and configured correctly, you will love your customized heating schedule, remote control, and energy savings. The combination of a smart thermostat and electric radiators gives homeowners the possibility to fine-tune the indoor climate according to their needs and preferences. While smart home technology is constantly in development, electric radiators with integrated intelligent thermostats-such as the pioneering one, Nest-appreciate the possibility to make living spaces more efficient and comfortable.


